
Every time we move, I donate an embarrassing amount of bags to charity. I am not talking about 13 gallon trash bags, people. I'm talking about giant lawn and leaf paper bags. I become ruthless--culling out anything I haven't seen in a while or that I feel we can not use.
Sadly, sometimes this means that when I am frantically searching for the orange halloween pails that I know I have, I do not find them. A dim memory of one peeking out of a lawn and leaf bag hits me, and I am in a bit of a panic, as Halloween is in, oh, 2 hours, and we have no bags for trick or treating.
Some may head to the store at this point, but do you know what's easier than awakening a 4 month-old from her nap, preparing her and her 2 year-old brother for a trip to the store, buckling them in their seats, unloading them, securing them in the shopping cart and carrier and shopping? Everything. So, with that in mind, I set out to upcycle, of course.
I wish I still knew exactly which tutorial I used when I first found how to convert t-shirts into bags, but there are so many, and I did this craft weeks ago (Edited: not this exact craft, a different shirt for holding some sewing supplies), so I can't remember which it was. A simple google search will produce many tutorials. I decided to use this method to make the babies their trick or treat bags.
I rummaged through my trusty bag of outgrown shirts (hurray for having a teenager who grows like a weed!) and found 2 children's white tees in size medium.
I began by cutting off each sleeve on a curve. Notice how imperfect my initial cuts are. I will clean them up later.

Cut the neckline out of the shirt. These will be your handles and opening, so make the cut as deeply as you'd like.

Now, cut vertical strips at the bottom of the t-shirt. I am not one for measuring, so I just eye-ball it.
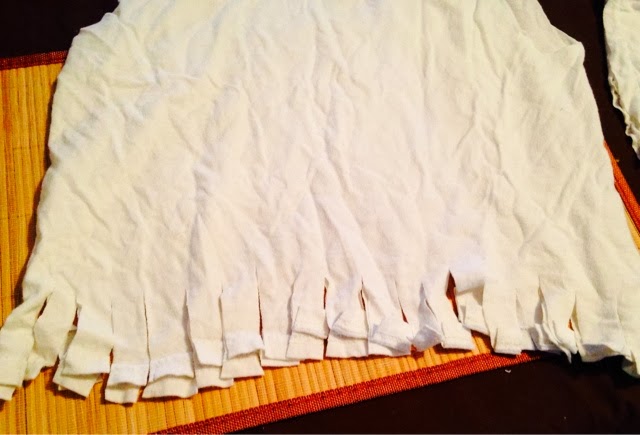
Next, tie a double-knot into each of the top and bottom strings. Clean up your sleeve and neck cuts if you haven't already and look what you have!

I took a king-size sharpie and drew a ghost-face on one side and the word, "Boo!" on the other. I placed a card inside each so that I didn't bleed through the fabric, drew on one side, turned over, drew the other side, then placed in the dryer for 10 minutes to seal. If you had more time, you could use fabric markers or paint, or sew on felt appliqués. This would really be a fun project for kids to decorate, as well. The finished bags:

And here they are, filled with candy. A successful—and sweet—upcycle!

No comments:
Post a Comment