
It seems that my blogging schedule has changed to once a week, since opening my new shop! I have tried to get to twice a week blogging, but so far, I haven't been able to. I'm just going to go with what I can do and accept that I'm not superwoman, so if you are still following along on my blog, I love you!
Now, on to this week's post!
A Facebook page friend asked me if I had a tutorial for my shabby flower that I sewed on baby girl's sweatshirt (that belonged to my teenage son, and my younger son) to jazz it up. I know that I used one when I sewed this summer, but I can not find one that incorporates both of these techniques, so I decided to create my own. First, the cuteness of this child flower:

Here's how I did it. Cut a small amount of fabric from anything cotton (I used an old dress). Rip the fabric the rest of the way, so that it frays. Any width or length is good, but err on the side of larger, so you can trim it down if you want it smaller or shorter.

Thread a long sewing needle, no knots at the end. Also, yes, my leopard-print leggings are amazing. Be jealous.

Run a basting stitch through the bottom part of the strip, leaving a long strand of thread at the end. Just keep loading up your needle with fabric, it doesn't matter at all how straight or even you get this.

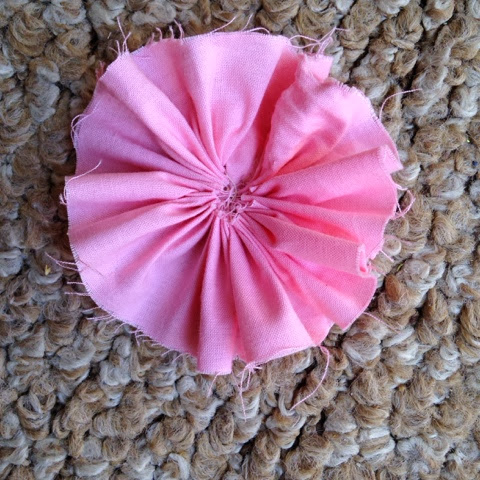
At the end, you'll have an accordion. Pull your needle through and make sure you have 2 long tails of thread on either end.

You'll have something like this:

Now, pull each side, shaping your ruffle into a round flower. and tie both pieces of thread together into a knot. Trim.

You'll have an overlapping flap. If you are making a hair bow or anything that won't be washed, you can simply run a line of hot glue across this to seal. You could also use washable fabric glue. I sewed it closed, though.


And you have your flower! You can trim up the outside if it's too large, or even run another basting stitch higher up to gather it even more if you want it even more "ruffly".
At this point you could call it done, or put a cute button in the center like this:

If you want to finish it the way I did the corsage flower in the sweatshirt, you'll need that second strip of fabric. Tie a knot into the end.

Fold the strip in half, length-wise.

Using your knot as your beginning point, roll the clean edge of fabric around it, turning the fabric under a bit with each turn. If you are going to wash this, you need to have your needle ready to begin adding a stitch every couple of turns to keep it together, or try fabric glue. If this will be a a hair piece, just use hot glue at every few turns.

Twist and turn around and around.

And around…

And voila! (Random lint piece wanted to come play in this photo, sorry!) I love these little rolled rosettes and actually like them all alone as well.

But add them to the center of your ruffled flower to make it extra special (stitch it or use fabric or hot glue). Trim up the outside as you like.

I like to cup the flower around the rosette and stitch it just along the bottom part of the top edge of the rosette, or hot glue it there, to give it a bit fuller dimension, but it's lovely as-is above.

There you go: shabby chic flowers, good for hair, clothes, embellishing bags, tea towels, as brooches, oh, the list goes on!
No comments:
Post a Comment